
FRAMR.Player PRO
- Open player settings
- Settings overview
- Package contents
- I/O ports and dimensions
- Technical Details
- Player API
Open player settings
Your FRAMR. Player will boot automatically as soon as the power supply is connected. There are two ways to open the settings of your player:
-
In case you have a USB keyboard at your fingertips, you may connect it to your player. After the player is fully started, hold Shift+Insert on the keyboard to open the configuration screen of your player.
-
If the player is accessible over your local network, you can also access the configuration page on your computer by entering the IP address of your player.
e.g.: https://192.168.0.100/ -
You could also start a browser window manually by pressing the keyboard key combination CTRL-N on the player, and enter the URL https://localhost/ by hand.
Enter the username “admin” and the password “admin” into the following login screen. Enter your own password, if you have already changed the password.
Using the player settings, you can configure your FRAMR. Player. The different options are explained in the following sections:
Settings overview
Information
The system information gives you an overview of various system details of your player, such as the firmware version (OS version) or the remaining available memory, as well as the current system load and temperature.
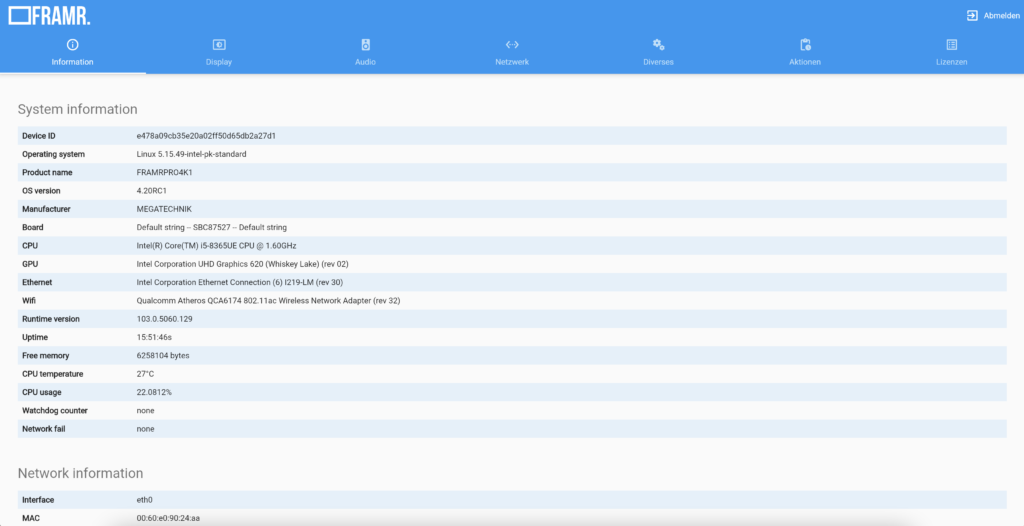
In network information you will find all available network adapters, the IP address (if available) and all other network-related information, which is used to operate the particular network adapter.

Display
This is where you can edit the display output preferences of your player to the connected displays and, for example, rotate the visual playback from the player.
Display mode:
Display mode determines the way the HDMI or Displayport output is used by your player. You can choose between the following options:
- Clone display to all display connections: Both ports of the player show the same content on all displays, the output is “cloned”.
- Extend display horizontally: A large virtual display area is stretched over all HDMI ports of your player, showing the FRAMR. Signage application in a horizontal axis across multiple monitors placed side by side.
- Extend display vertically: A large virtual display area is stretched over all HDMI ports of your player, showing the FRAMR. Signage application in vertical axis across multiple monitors placed on top of each other.
- Separate output for each display connection: An independent FRAMR. Signage application is launched for each HDMI port of your player, these run independently and appear in the FRAMR. Cockpit as separate players.
- Customized display settings (for experts only): Here you can configure very special display variants in coordination with the FRAMR. Serviceteam. Only recommended for specialists!
Display resolution
In factory state, the resolution for the display output is automatically determined from the EDID table of your connected displays using the highest available resolution. You can also select a custom resolution at this point to adjust the resolution for your use case.
Display rotation
You can use the display rotation to adjust the screen playback of your player to the way your displays are mounted.
- Normal: The output will not be rotated and will be shown on the display in a horizontal alignment.
- Right: The playback will be rotated 90 degrees to the right, the display should be mounted in portrait orientation for this type of operation (pivot display).
- Inverted: The playback is rotated by 180 degrees, the display should be mounted upside down.
- Left: The playback will be rotated 90 degrees to the left, the display should also be mounted in portrait format (pivot display) for this type of operation.
Lock color space
Some displays require special color settings for the correct distribution of the visual information. This function can be used to permanently set this “color space”.
Touch settings
You can configure a touch input device like touchscreens or touch membranes on your display using the touch settings. To do so, enter the device name of the touch input device in the text field or select one of the devices recognized by the player in the drop-down box below to copy the value to the input field.
“Calibrate touch input device” button
By pressing this button you can launch the calibration program for touch input devices. Please remember to save your touch input device settings before you start the tool.

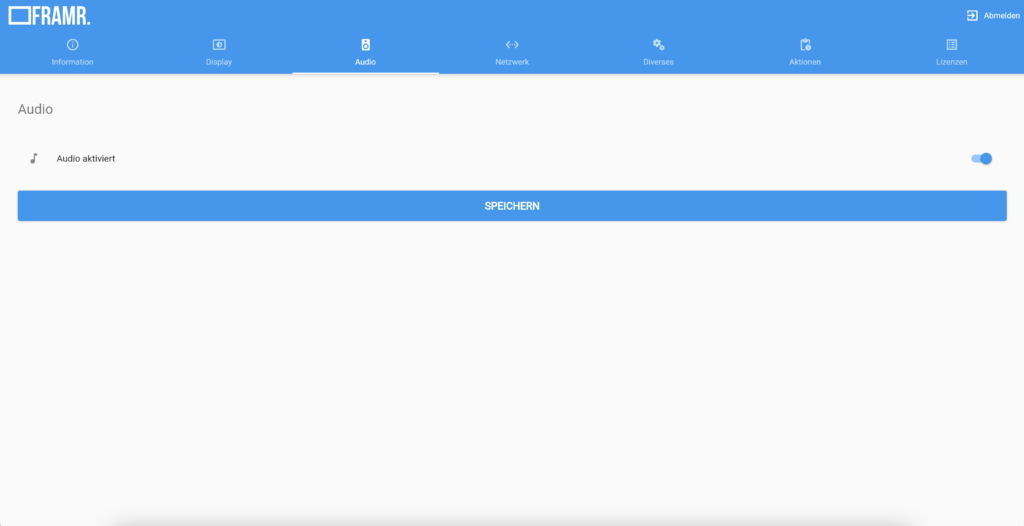
Audio
You can configure the audio playback of your player in the audio settings.
Audio enabled: Enable or disable the audio playback of your player.
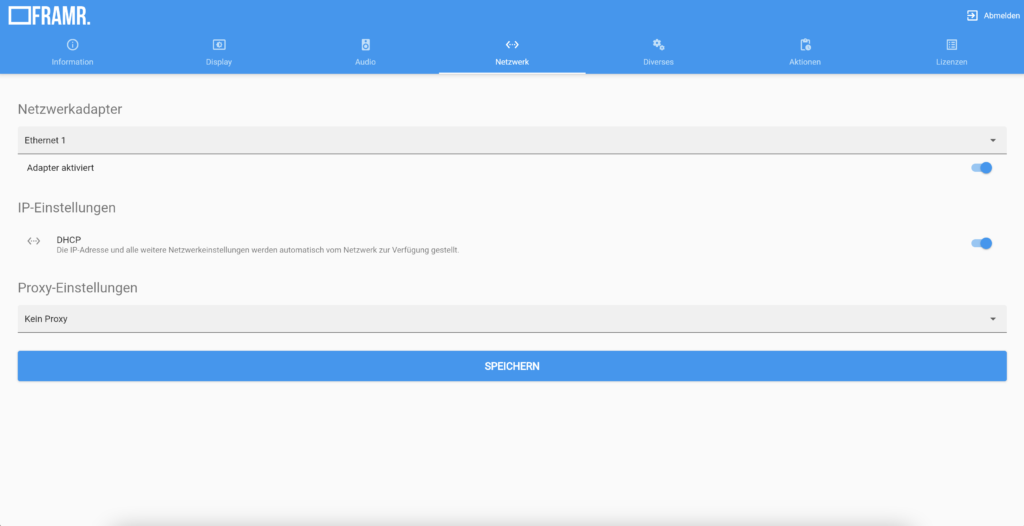
Network settings
Network adapter
You can select the network adapter that you want to adjust using the following options in the drop-down box. Depending on the selection, the interface shows different configuration options.
Adapter enabled
Use this button to enable or disable a selected network adapter. Please note: A deactivated network adapter is no longer accessible from your network. If all additional network ports also become inactive, you may need physical access to the player in order to reactivate network adapters.
IP settings
DHCP
Activate the auto assignment of an IP address to your player. This is only supported if your router in the network offers this feature.
IP address
Enter an IP address for this player. IP address is the network address of your player in the local network. It is automatically obtained from the router if DHCP is used, if you enter manually, you may want to ask your network administrator for the address.
Netmask
The netmask is automatically obtained from the router when using DHCP. Again, if you are entering it manually, contact your network administrator for the correct information.
Gateway
Provides the connection to the internet and is automatically obtained from the router when using DHCP. In case of entering the gateway manually, please contact your network administrator for the correct information.
DNS
The nameserver is needed for the translation of domain names into IP addresses. You can use the default name server provided by the router for the network. Alternatively, you can also use for example the nameserver service of Google at the address 8.8.8.8.
Additional settings when using Wifi wireless networks
SSID
Enter the name of your WiFi network here.
Encyption
You may now select the used encryption method of your WiFi network in this drop-down box.
WiFi password
Finally, you should enter the password needed to connect to your WiFi network here.
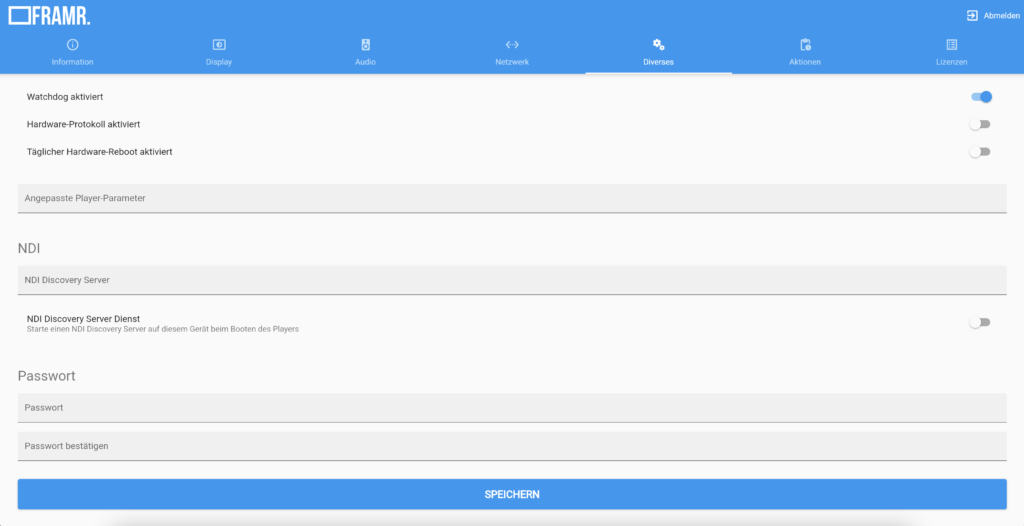
Other
URL to FRAMR. Server: You can set a customized FRAMR. Cloud server to configure the player for an internal on-premise installation, for example. The input field usually remains empty when using the cloud service, in this case the default server “cloud.framr.tv” is used as the destination.
Time server: This is where you can configure the synchronization of the system time. The default address is pool.ntp.org, which is common for most Linux distributions. If you want to use your own time server for synchronizing with your player, enter the address to this server in this field.
Timezone: In order to display the time of day and scheduled information correctly in the FRAMR. Signage application, you can configure the timezone of your player here.
URL to firmware server: Here you can enter the address to the FRAMR. Firmware server so the player can successfully download and install firmware updates. In the initial state, “http://firmware.framr.tv/” will be filled in by default.
Watchdog enabled: The term watchdog refers to failure detection capability of the FRAMR. Signage application. If this option is enabled, the player will automatically restart the application in case of a program error or crash. In severe error scenarios, it is even possible that the entire hardware might be restarted automatically.
Hardware log enabled: The hardware log tracks system-critical events such as disconnection from the network, configuration changes, and more on your player’s hard drive. This protocol can be downloaded later by opening the settings via web browser on your PC.
Daily hardware reboot enabled:
Custom player parameters: Additional Chromium Command Line Switches can be specified here, used to start the included Chromium browser. Only suitable for specialists!
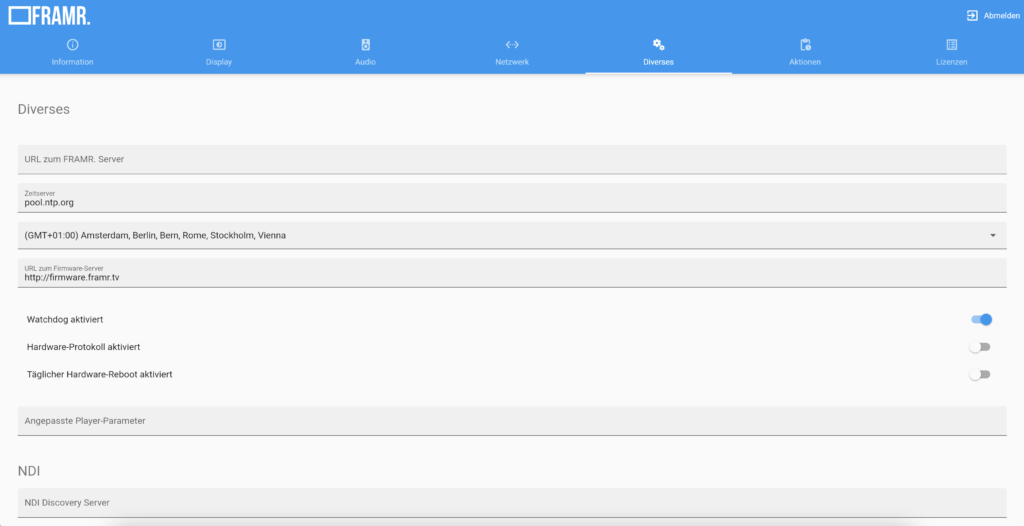
NDI
NDI is a video-over-IP transport and codec used for remote, cloud or hybrid production. FRAMR. Signage provides a module to display NDI on your screen. Information about NDI is available at https://www.ndi.tv/
(available from version 4.20)
NDI Discovery Server: Enter the IP address to an NDI discovery server into the text box, this will help the player to discover NDI sources in the local network. If no server is specified, the player will use mDNS to discover NDI sources in the network.
NDI Discovery Server Service: By enabling this flag, you can also start your own NDI Discovery Server together with this device, which will be available to all other players and NDI devices on the network.
Password
The default login password for the settings of your FRAMR. Player is “admin”. You can change this password here.
Actions
The following commands can be used to perform various actions on your player.
Clear cache
After pressing this button, all content downloaded from the server will be purged from the player and then downloaded again from the FRAMR. Cloud. A network connection to the server is required for successfully completing this action.
Connect to support
Connects the player via VPN to the FRAMR. support network to give our support staff the ability to remotely diagnose problems.
Disconnect from support
Terminates the support connection described above.
Open console
Needed by the FRAMR. Support team for internal purposes.
Update firmware
If there is a firmware update available for this player, it will be retrieved and installed after pressing the button. In this case, please wait for the player to restart and do not disconnect the power supply during the update process!
Restart
The “Restart” button will shut down the player and restart it afterwards.
Download log
You can download the system log from the player storage and analyze it afterwards. See the “Other” tab for more information on how to activate the log.
Export settings
Use this button to export the settings of your FRAMR.Player to transfer them to another player.
Import settings
Allows you to import the settings exported with the help of the previous button.


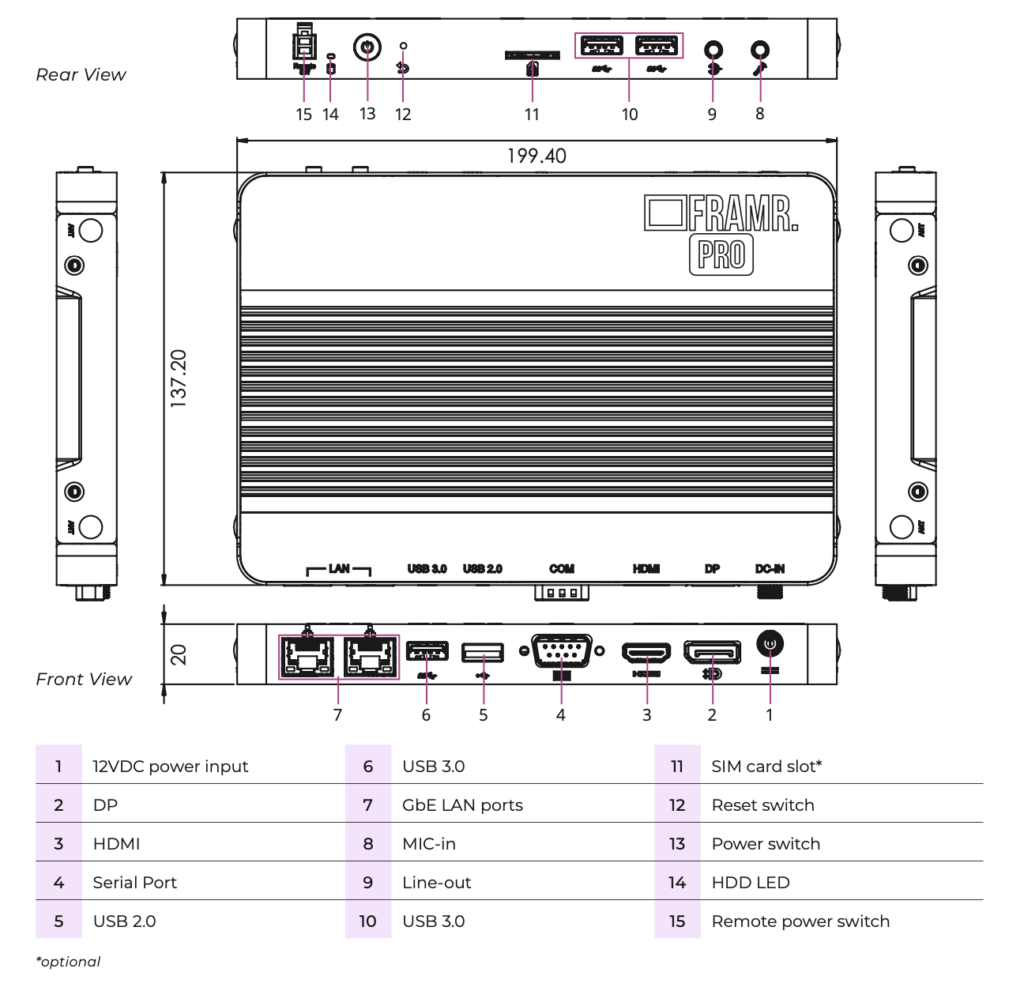
Package includes
1x System unit
1x EU power cable
1x 35-W power supply unit
2x External wireless antenna (mount on the antenna sockets)
4x Foot pad
2x Mounting bracket
1x Quickstart guide
I/O ports and dimensions
The following illustrations show I/O ports on this FRAMR. Player.
Technical Details
CPU: Intel Pentium Processor
RAM: 4 GByte
Storage: 64 GByte SDD-Drive
WIFI: Yes
Channels: 2
Output modes: clone, extended, dual
Resolution: 1920x1080px
Warranty: 3 years
Weight: 0.90 kg
API
Placeholder
You can use placeholders in modules using the {{variable|default}} format to populate dynamic content through the Player API. The value “variable” corresponds to the key of the API call, which is replaced by the value given there. In addition, you can optionally use “default” to define a default value for the placeholder that is used if no value or an empty text (“”) is returned in the Player API for the key that is used.
Example:
Calling the Player API at the endpoint with the parameters { “key”: “number”, “value”: “100” } will change the result from “{{number|50}}” to “100”.
POST “https://[IP]/api/variable” { “key”: “number”, “value”: “100” }
In the initial state of the player after startup or by clearing the value via API, the default value “50” is displayed in this example.
POST “https://[IP]/api/variable” { “key”: “number”, “value”: “” }
Of course, you can use multiple placeholders in the module at the same time.
Change playlist
You may change your player playlist externally by using the player API. Just set the key “playlistID” and ID of the desired playlist the via Player-API to change the currently active playlist of a player. You may find the playlist ID by opening a playlist and inspect the URL in the browser bar, e.g. https://cockpit.framr.tv/channels/schedule/1234/.
Example:
POST “https://[IP]/api/variable” { “key”: “playlistID”, “value”: “[ID]” }
The target player will then view the specified playlist until either you reset the “playlistID” again via API or reboot your device.
Example:
POST “https://[IP]/api/variable” { “key”: “playlistID”, “value”: “” }